微信小程序中input表单与redio及下拉下文的使用
微信小程序,简称小程序,英文名Mini Program,是一种不需要下载安装即可使用的应用,它实现了应用“触手可及”的梦想,用户扫一扫或搜一下即可打开应用。小程序是一种不用下载就能使用的应用,也是一项门槛非常高的创新,经过将近两年的发展,已经构造了新的小程序开发环境和开发者生态。
这篇文章主要介绍了微信小程序 input表单与redio及下拉列表的使用实例的相关资料,希望通过本文能帮助到大家,需要的朋友可以参考下微信小程序 input表单与redio及下拉列表的使用实例
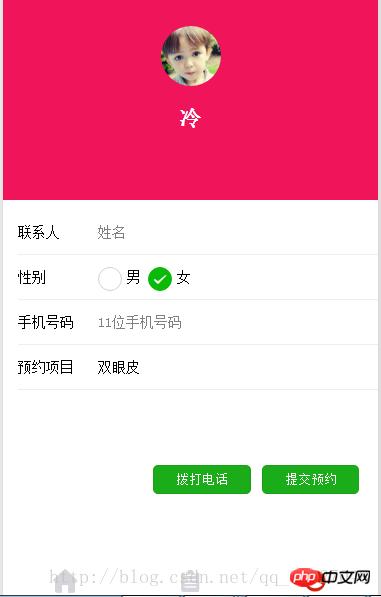
一个简单的预约类型的表单,效果

主要代码:
  <form bindsubmit="bindSave">
   <view class="form-box">
    <view class="row-wrap">
     <view class="label">联系人</view>
     <view class="label-right">
      <input name="userName" class="input" type="text" placeholder="姓名" value="{{addressData.userName}}" />
     </view>
    </view>

    <view class="row-wrap">
     <view class="label">性别</view>
     <radio-group class="radio-group" bindchange="radioChange">
      <label class="radio" wx:for="{{items}}">
       <radio value="{{item.name}}" checked="{{item.checked}}" />{{item.value}}
      </label>
     </radio-group>

    </view>
    <view class="row-wrap">
     <view class="label">手机号码</view>
     <view class="label-right">
      <input name="mobile" class="input" maxlength="11" type="number" placeholder="11位手机号码" value="{{addressData.mobile}}" />
     </view>
    </view>

    <view class="row-wrap">
     <view class="label">预约项目</view>
     <picker bindchange="bindCasPickerChange" value="{{casIndex1}}" range="{{casArray}}">
      <view>
       <text>{{casArray[casIndex]}}</text>
      </view>
     </picker>


    </view>

   </view>

   <view class="btn-tyc">

    <button size="mini" bindtap="tapAddCart" class="submit" type="primary" formType="submit">提交预约</button>
   </view>

   <button size="mini" bindtap="tlp_phone" class="phone" type="primary">拨打电话</button>
  </form>
.js文件
 data: {
  nickName: "",
  avatarUrl: "",
  casArray: ['双眼皮', 'TBM', '隆胸', '减肥', 'qita'],
  userName: '',
  mobile: '',
  Gender: 'female',
  casIndex: 0,
  items: [
   { name: 'male', value: '男' },
   { name: 'female', value: '女', checked: 'true' },
  ]
 },
 radioChange: function (e) {
  console.log('值:', e.detail.value)
  this.setData({
   Gender: e.detail.value
  })
 },
 /**
  * 生命周期函数--监听页面加载
  */
 bindCasPickerChange: function (e) {
  console.log(this.data.casArray);
  console.log('下拉选择的是', this.data.casArray[e.detail.value])
  this.setData({
   casIndex: e.detail.value
  })
 },