 总结:以上就是本文章的主要内容,希望通过这个案例大家可以对js和jQuery所学的内容进行巩固和复习
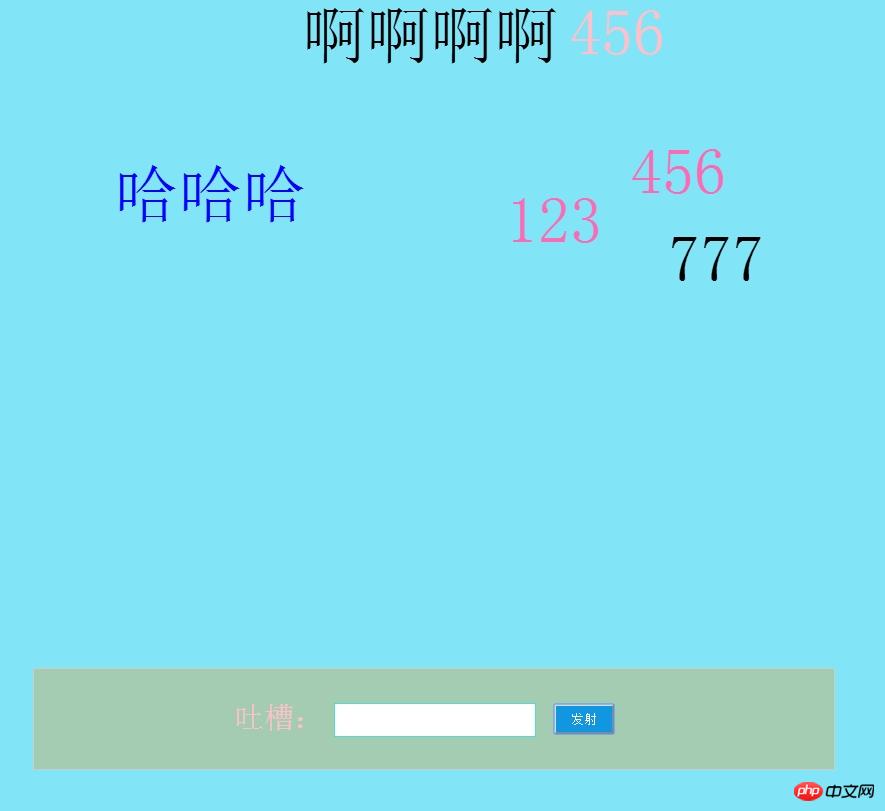
案例:弹幕发布【JavaScript教程】【jQuery教程】
必备知识点:
(1)随机数产生:var demo=parseInt(Math.random()*500)
(2)获取一个元素的值:$("demo").val();
(3)给某个元素增加文本值:$("demo").text($("text").val())
(4)清空元素的值:$("demo").val("")
(5)jquery中animate属性:
$(dem).animate({params},speed,callback
必需的 params 参数定义形成动画的 CSS 属性。
可选的 speed 参数规定效果的时长。它可以取以下值:"slow"、"fast" 或毫秒。
可选的 callback 参数是动画完成后所执行的函数名称。
代码:
<!DOCTYPE html>
<html>
<head>
    <meta charset="UTF-8">
    <meta name="viewport" content="width=device-width, initial-scale=1.0">
    <meta http-equiv="X-UA-Compatible" content="ie=edge">
    <title>弹幕</title>
    <style>
    body{
   background-color:rgb(129,228,247);

    }
    .box1{
           width:100%;
           height:100%;
           position: absolute;
           bottom:-50px;
        }
   .box2{
        width:800px;
        position: absolute;
        height:100px;
        border:1px solid #ccc;
        background-color:rgb(164,204,178);
        bottom:50px;
        left:30%;
    }
    p{
        width:100px;
        height:50px;
        position: absolute;
        left:200px;
        top:1px;
        font-size:30px;
        color:pink;
    }
    .input{
        width:200px;
        height:30px;
        border:1px solid rgb(71, 224, 217);
        position: absolute;
        left:300px;
        top:34px;
    }
    .btn{
        width:60px;
        height:30px;
        position: absolute;
        left:520px;
        top:35px;
        background-color:rgb(17,150,225);
        color:#fff;
    }
    span{
      width: 300px;
      height: 140px;
      position: absolute;
      overflow: hidden;
      color: #000;
      font-size: 4em;
      line-height: 1.5em;
      cursor: pointer;
      white-space: nowrap;
    }
    </style>
     <script src="jquery/jquery-1.12.4.js"></script>
    <script>
    $(function(){
        var colors=["black","pink","hotpink","blue","yellow"];//颜色数组,随机色从中产生
        $(".btn").click(function(){
            var radomColors=parseInt(Math.random() * colors.length);//随机颜色
            var radomY=parseInt(Math.random()*500);//弹幕出现的随机高度
            $("<span></span>").text($(".input").val())//创建一个span并且给他input值
           .css("color",colors[radomColors]) //给样式增加随机生成的颜色
            .css("left",1200)//设置left值,弹幕从哪儿开始
            .css("top",radomY)//设置top
            .animate({left:-500},5000,function(){
                $(this).remove();}//让字体按5000毫秒的速度向左移动移动
            ).appendTo(".box1");
            $(".input").val("");
        });
    });</script>
</head>
<body>
    <div class="box1">
    <div class="box2">
       <p> 吐槽:</p><input type="text" class="input">
        <button value="发射" class="btn">发射</button>
    </div>
</div>
</body>
</html>
效果图:
 总结:以上就是本文章的主要内容,希望通过这个案例大家可以对js和jQuery所学的内容进行巩固和复习
以上就是利用JavaScript和jQuery知识实现有趣的弹幕效果的详细内容,更多请关注php中文网其它相关文章!
……