Redmi红米路由器AX6刷OpenWrt图文详细教程
小米旗下的红米AX6是一款性价比很高的无线WiFi6路由器,它拥有3000M无线速率,高通6核处理器,红米AX6无论是官方固件作为 AP Mesh Wi-Fi 的信号还是刷 openwrt 处理「网络数据」都是性价比非常非常高的选择,这方面性能上其实完全不输软路由。
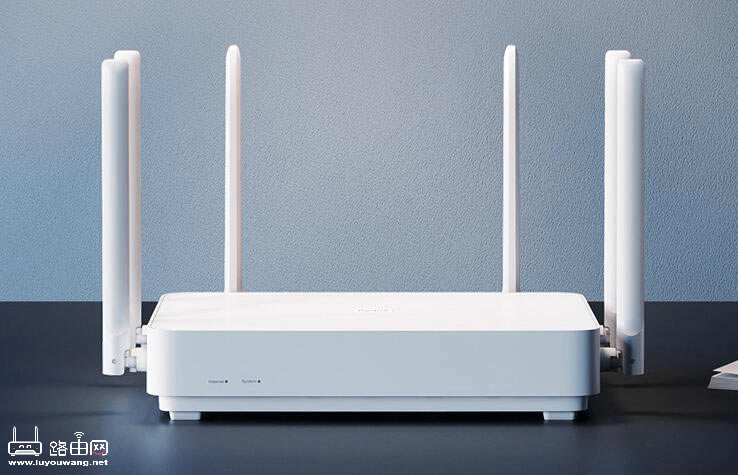
红米AX6
准备:
一台电脑(Mac Windows 均可)
另外一台已经是 openwrt 的路由器(打开了 SSH,用来当服务器)
Windows用户需要安装?Putty?和?WinSCP,Mac用户使用终端命令行即可
警告:
如果你操作错误等情况可能会变砖得返厂,我不会对此负责
目前教程也会比较麻烦,你旁边有得有一台别的 openwrt 路由器作为辅助
固件不是特别稳定 Wi-Fi 因为驱动原因暂时比官方的要差不少,如果你是觉得你是新手可以再等等
暂时还没刷回官方的教程(以后肯定会有)
第一步:降级并恢复出厂设置
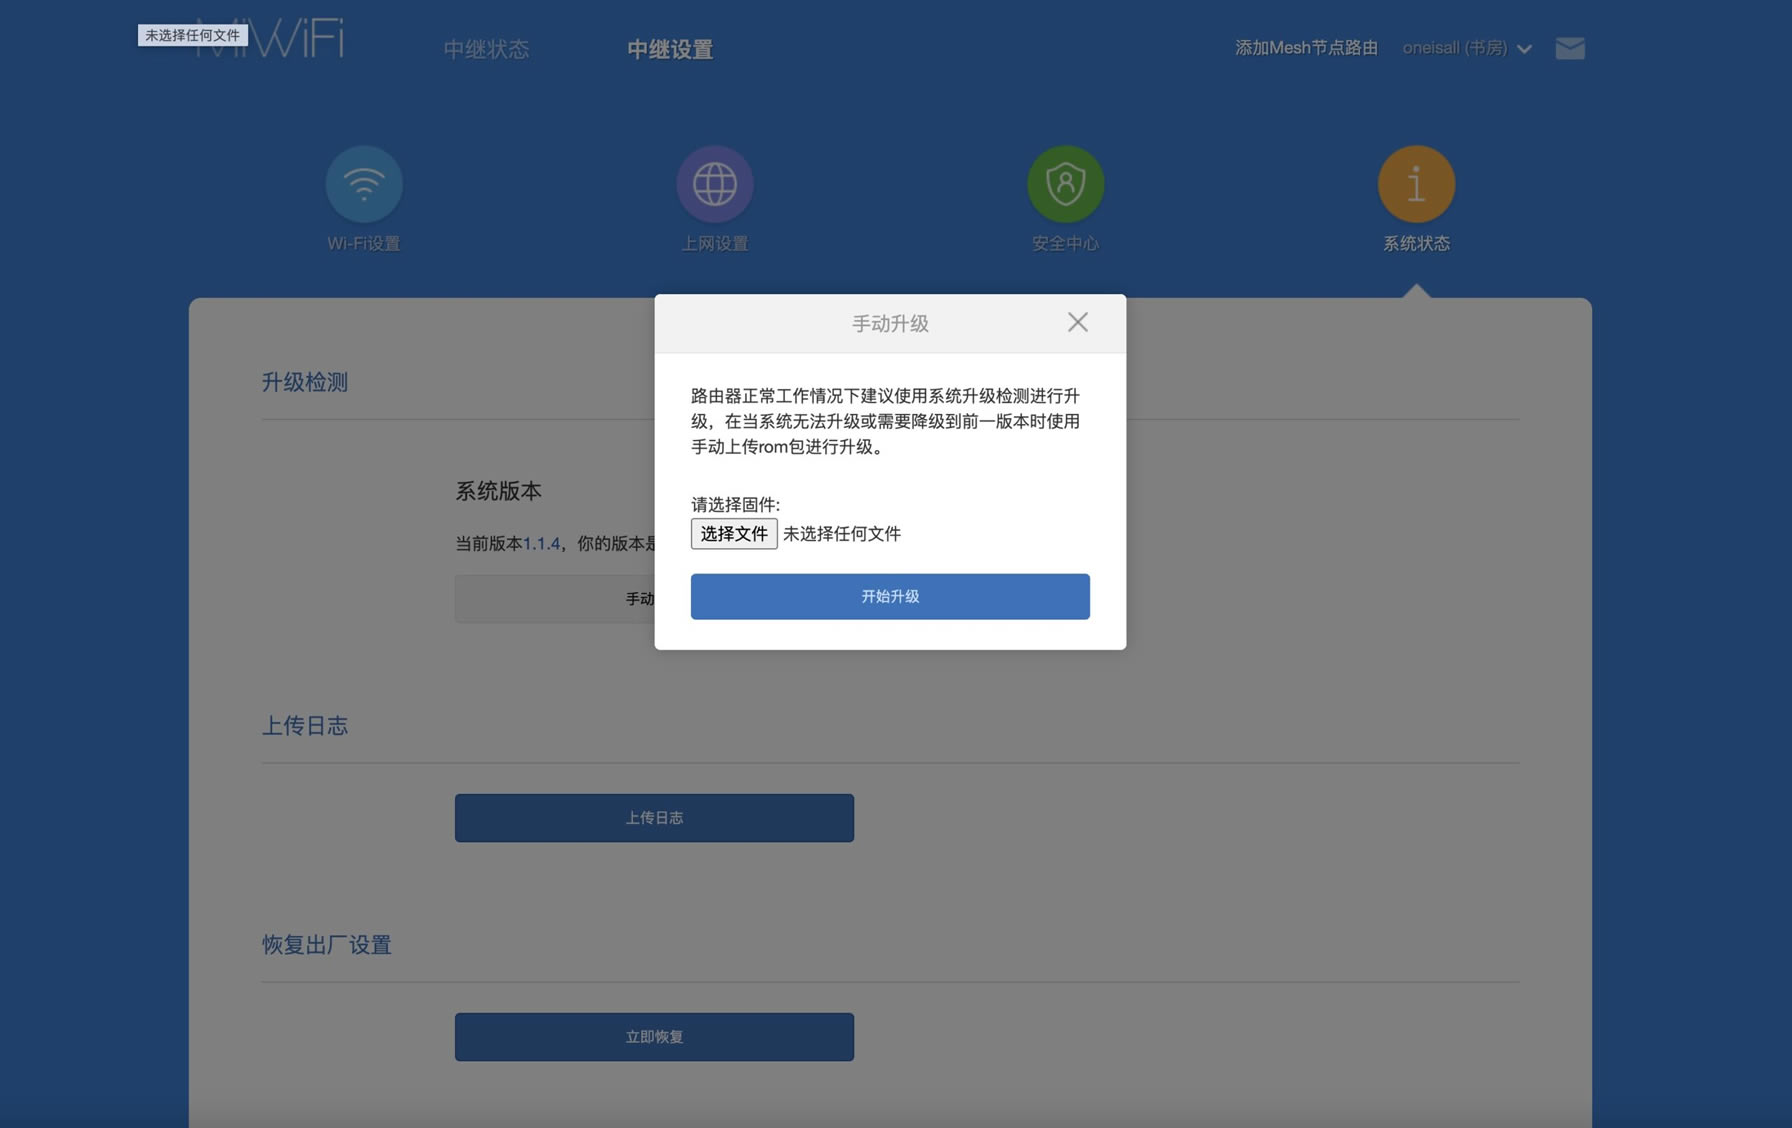
红米 ax6 1.0.16 固件?红米 ax6 1.0.18 固件,下载其中一个即可(推荐下载 1.0.16 );打开路由器后台选择 系统升级—手动升级—然后选择下载好的固件,等待重启。
然后最好再恢复下出厂设置。
第二步:准备 openwrt 服务
准备一台刷了 openwrt 的路由器,只需要接上电源有 Wi-Fi 信号即可(后续会让红米 AX 6 Wi-Fi 连接上此 openwrt 路由器)。
创建 lua 文件
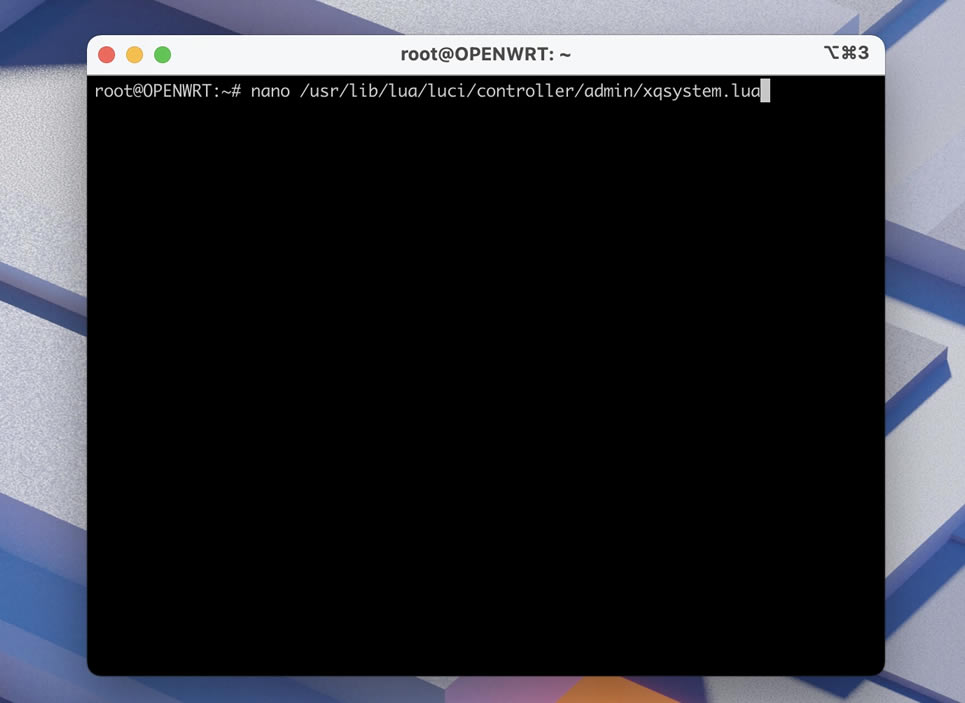
ssh 连接上 openwrt 的路由器,然后使用 nano 创建 /usr/lib/lua/luci/controller/admin/xqsystem.lua 这样一个文件。
nano /usr/lib/lua/luci/controller/admin/xqsystem.lua
如果你的系统没有 nano 你可以使用 vi 或 vim
vim /usr/lib/lua/luci/controller/admin/xqsystem.lua
文件内容填写下面的保存即可。
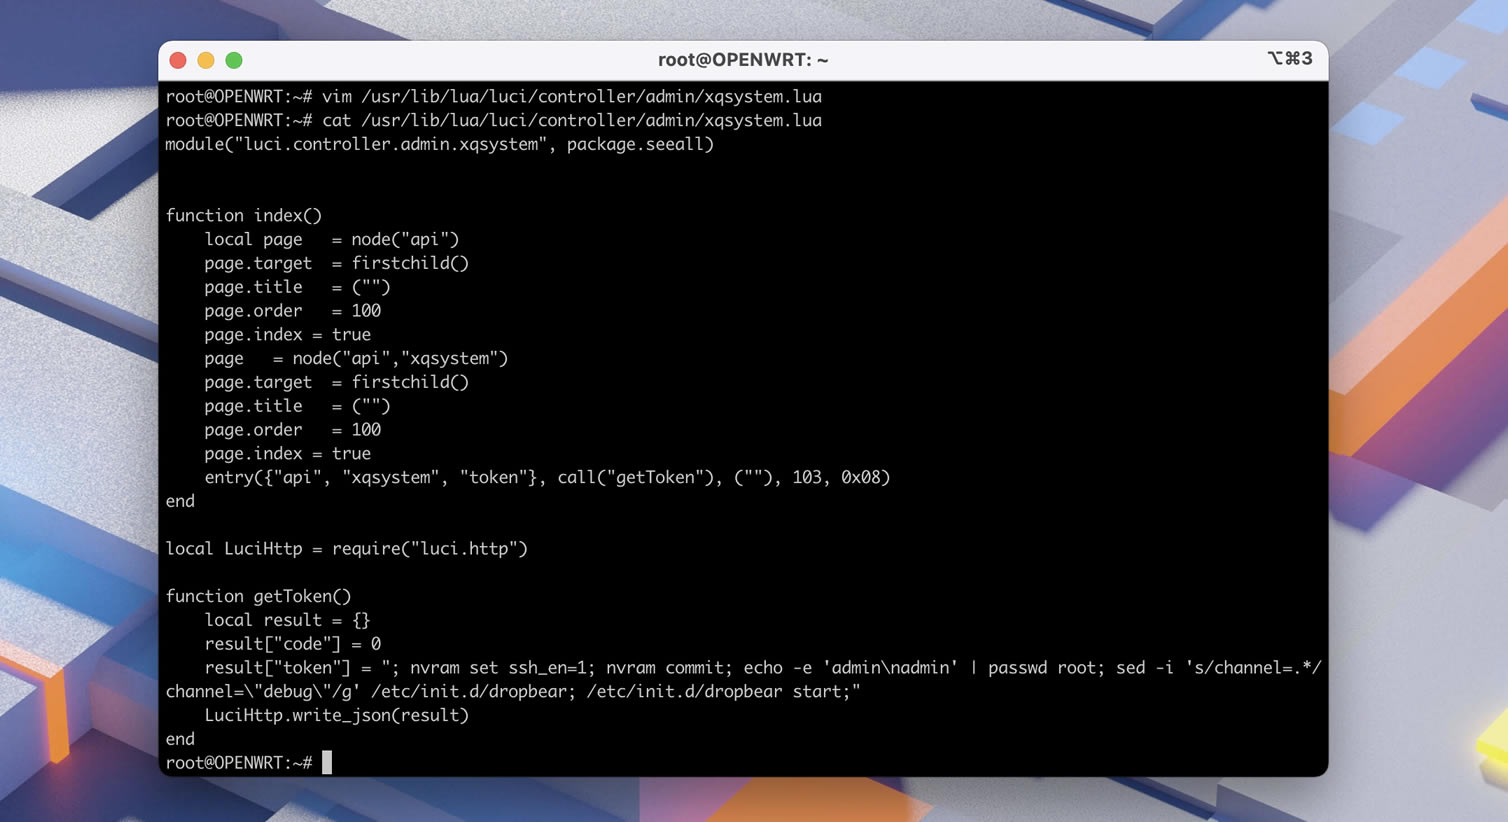
module("luci.controller.admin.xqsystem", package.seeall)


function index()
    local page   = node("api")
    page.target  = firstchild()
    page.title   = ("")
    page.order   = 100
    page.index = true
    page   = node("api","xqsystem")
    page.target  = firstchild()
    page.title   = ("")
    page.order   = 100
    page.index = true
    entry({"api", "xqsystem", "token"}, call("getToken"), (""), 103, 0x08)
end

local LuciHttp = require("luci.http")

function getToken()
    local result = {}
    result["code"] = 0
    result["token"] = "; nvram set ssh_en=1; nvram commit; echo -e 'admin\nadmin' (浏览器部落,专业提供软件下载)

    passwd root; sed -i 's/channel=.*/channel=\"debug\"/g' /etc/init.d/dropbear; /etc/init.d/dropbear start;"
    LuciHttp.write_json(result)
end
输入完成后你可以 cat /usr/lib/lua/luci/controller/admin/xqsystem.lua 检查一下。
修改该 openwrt 路由器的 Lan 地址,并关闭 DHCP
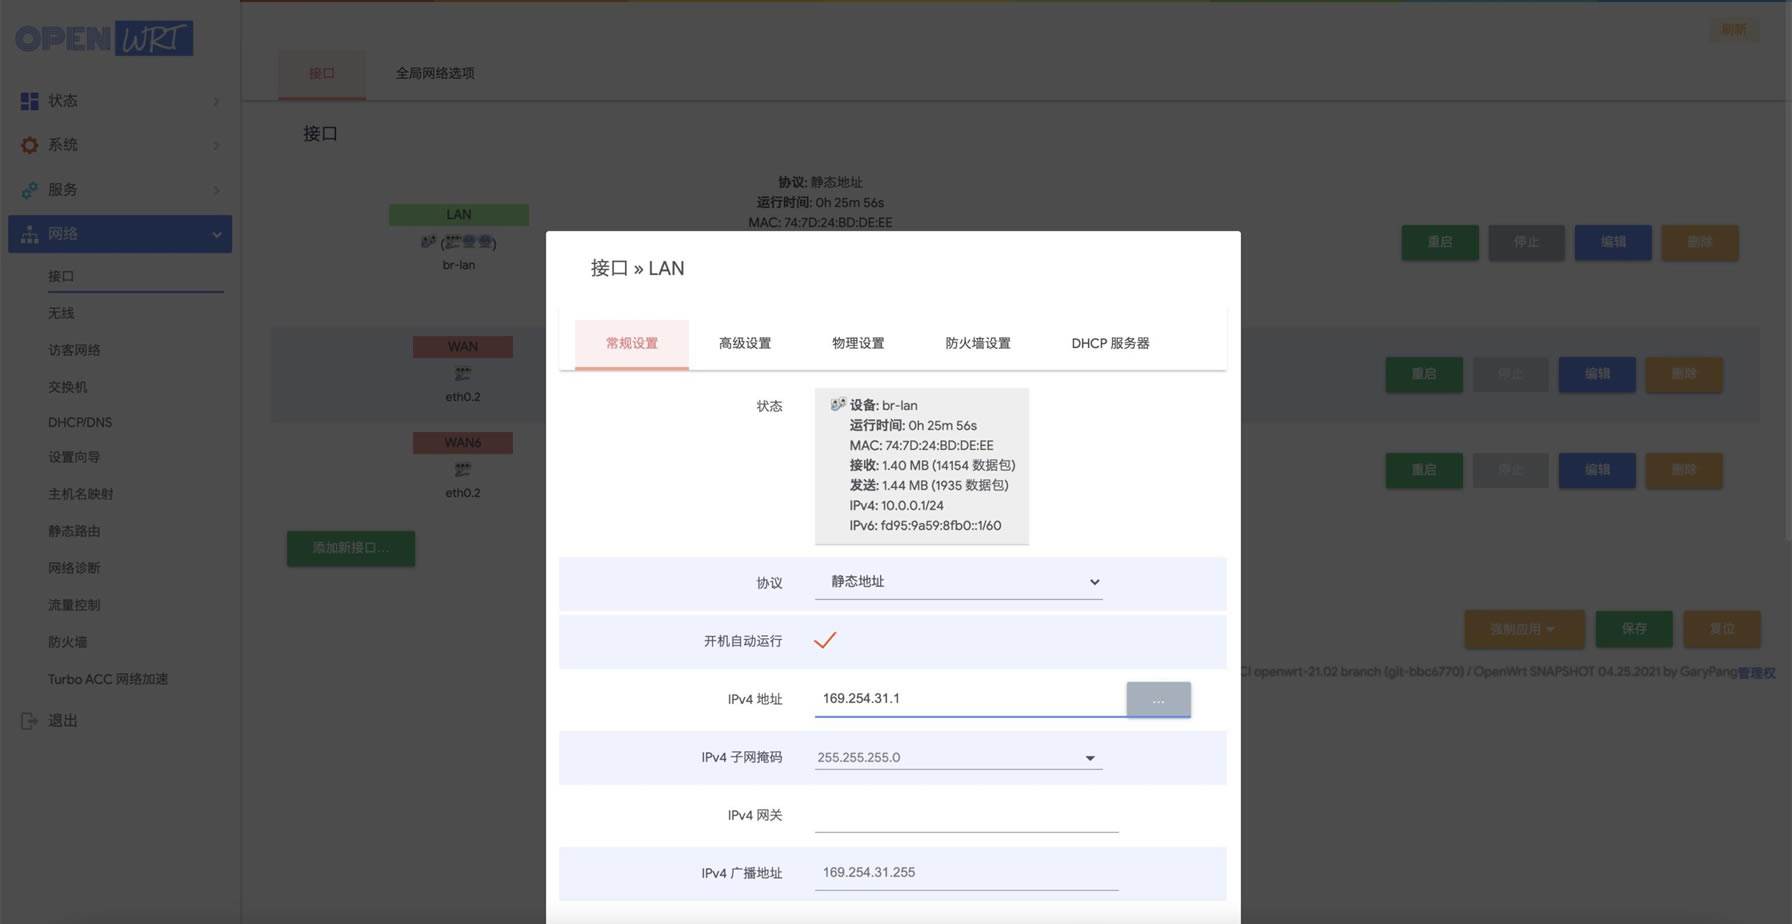
登陆 openwrt 的后台,在 网络-接口-Lan 选择编辑,IPv4 地址修改为 169.254.31.1。
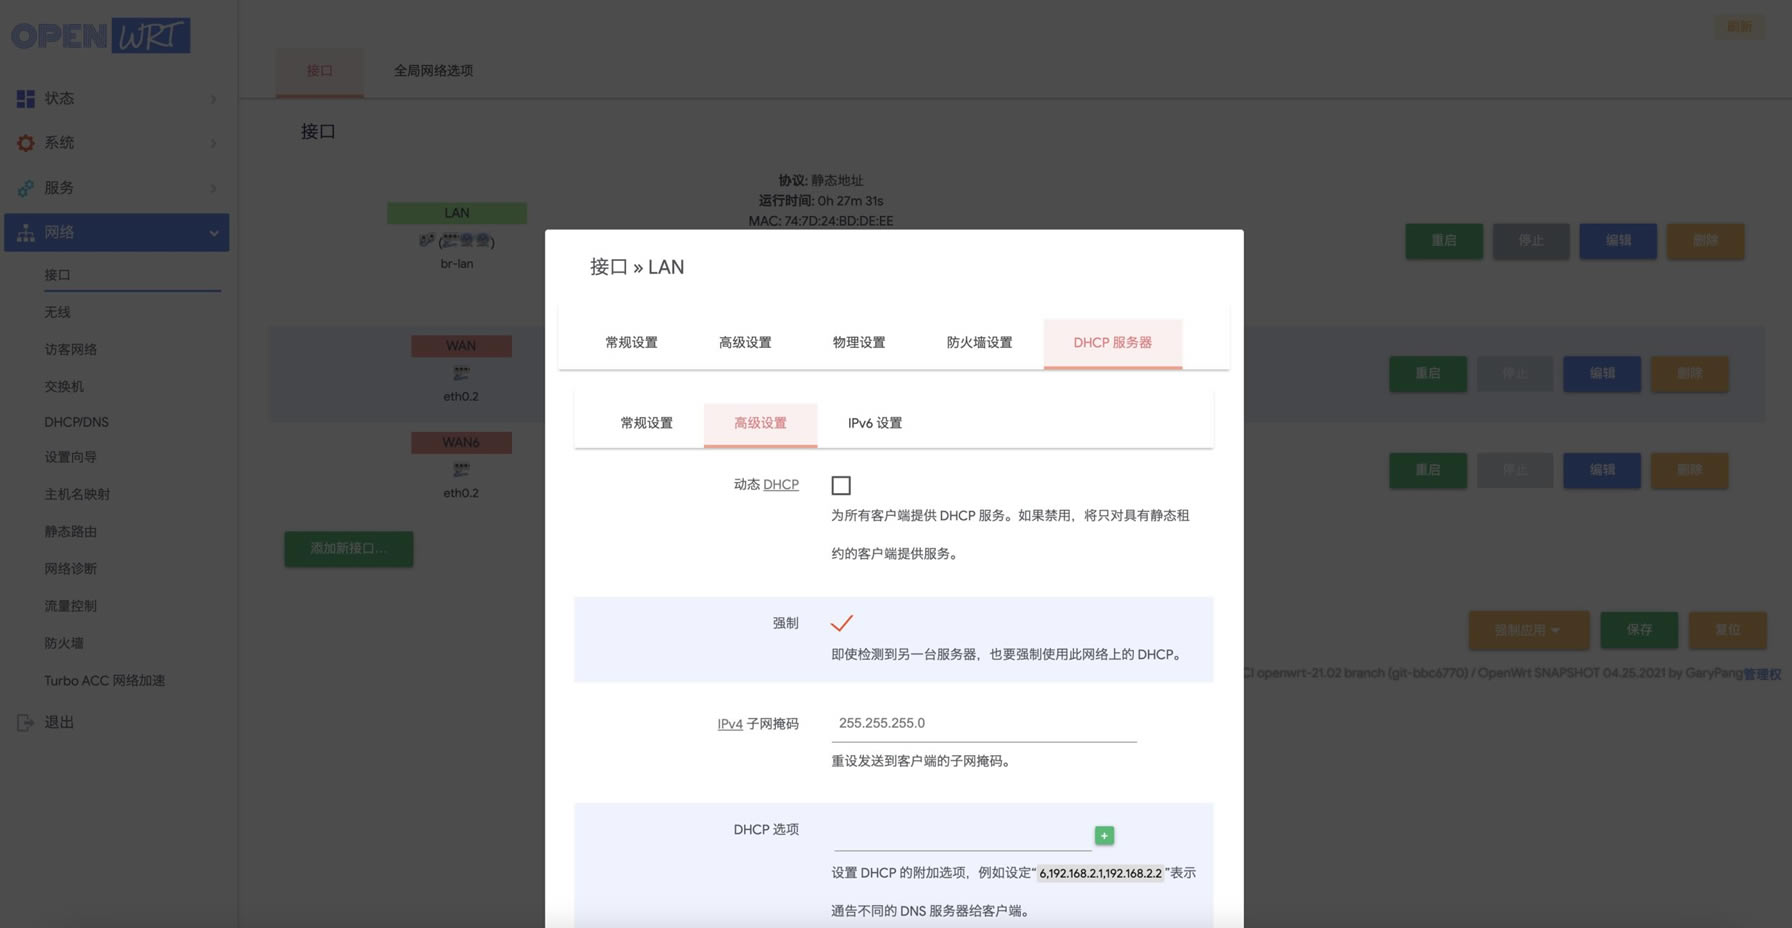
在 DHCP 服务器 — 高级设置里取消勾选 动态 DHCP(也就是关闭 DHCP,这会让你需要手动设置网络 IP 才能连接上该 openwrt 路由器)然后保存 并 应用。
然后重启该 openwrt 路由器。
验证
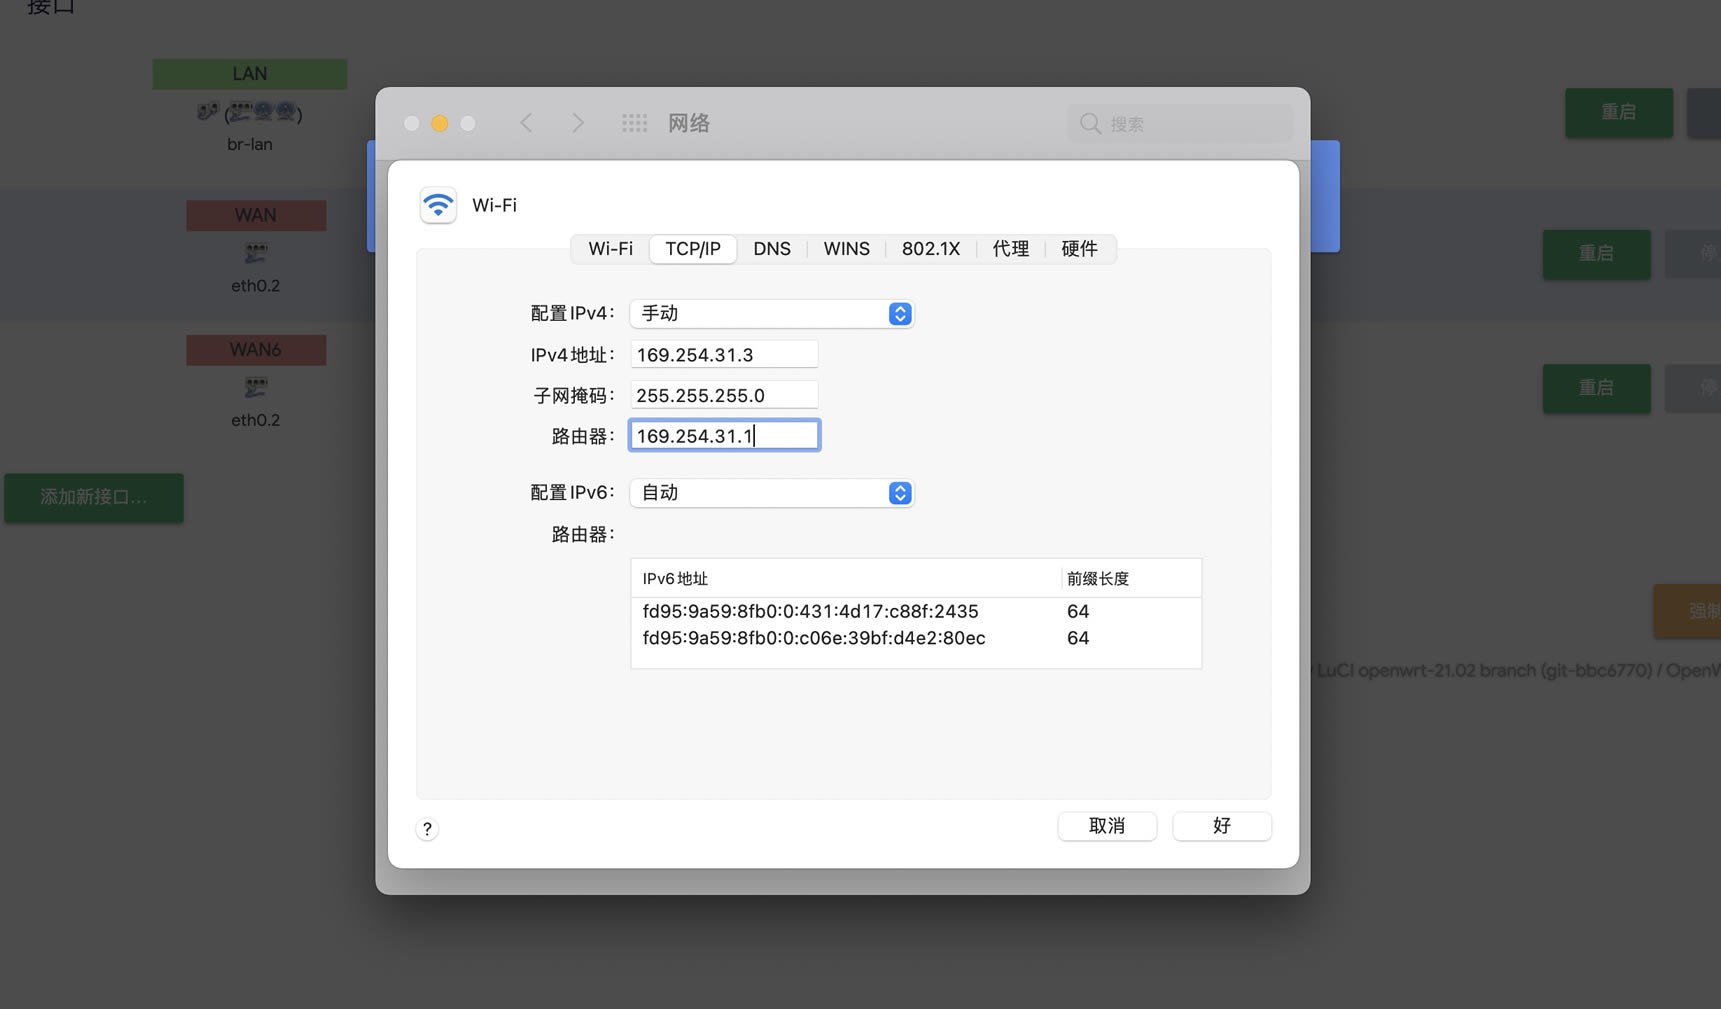
想再次连接到 openwrt 路由器,你需要讲电脑的网络 Wi-Fi 设置为手动 IPv4 (IP 地址填写:169.254.31.3;子网掩码:255.255.255.0;路由器:169.254.31.1)。
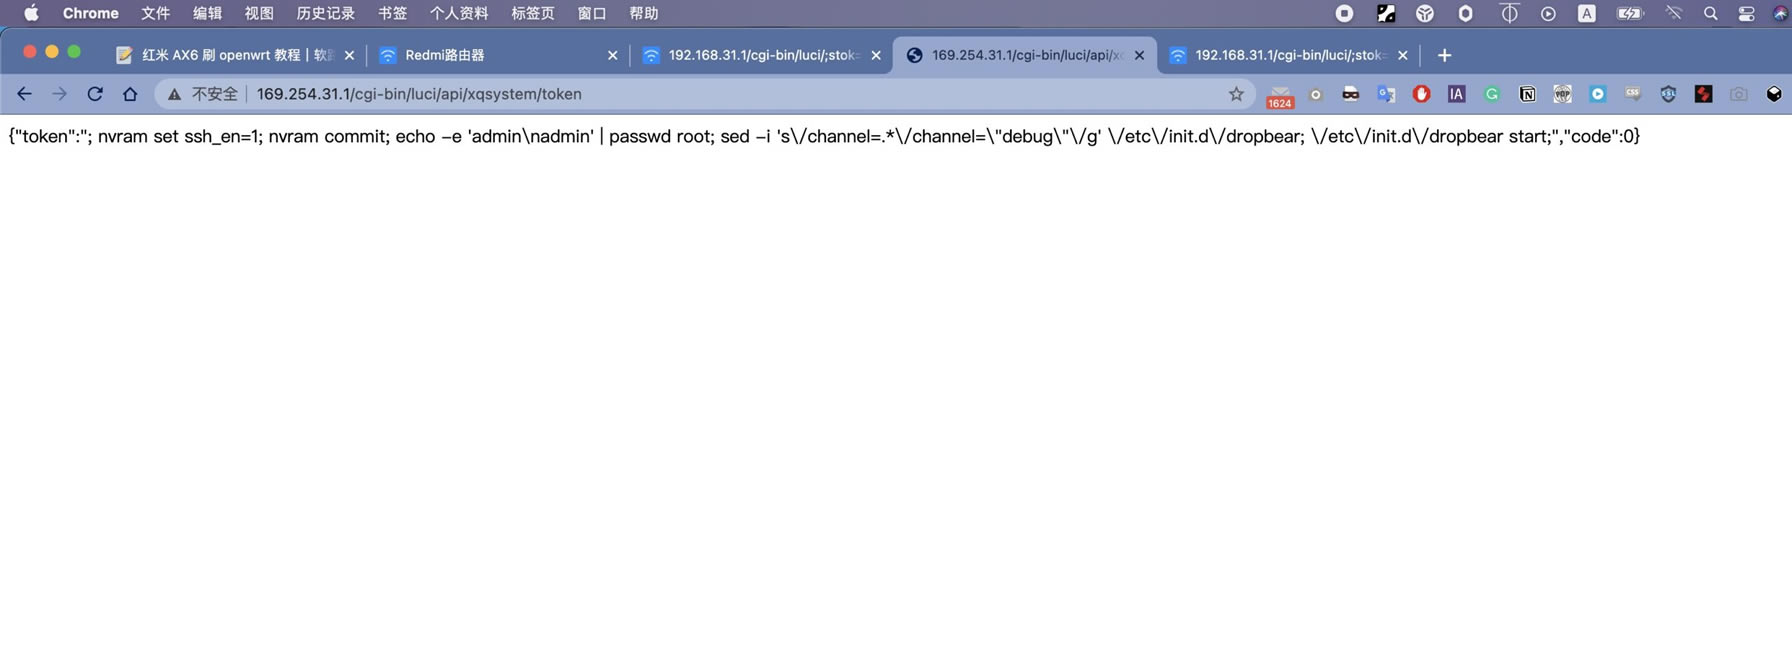
然后浏览器访问:http://169.254.31.1/cgi-bin/luci/api/xqsystem/token,如果得到下面的结果,则证明你设置成功。

第三步:红米 AX 6 破解 SSH
将电脑的网络设置回自动获取 DHCP,然后最好将电脑用网线和 红米 AX6 连接(因为红米 ax6 解锁 Wi-Fi 可能会掉线)。
获取后台 STOK
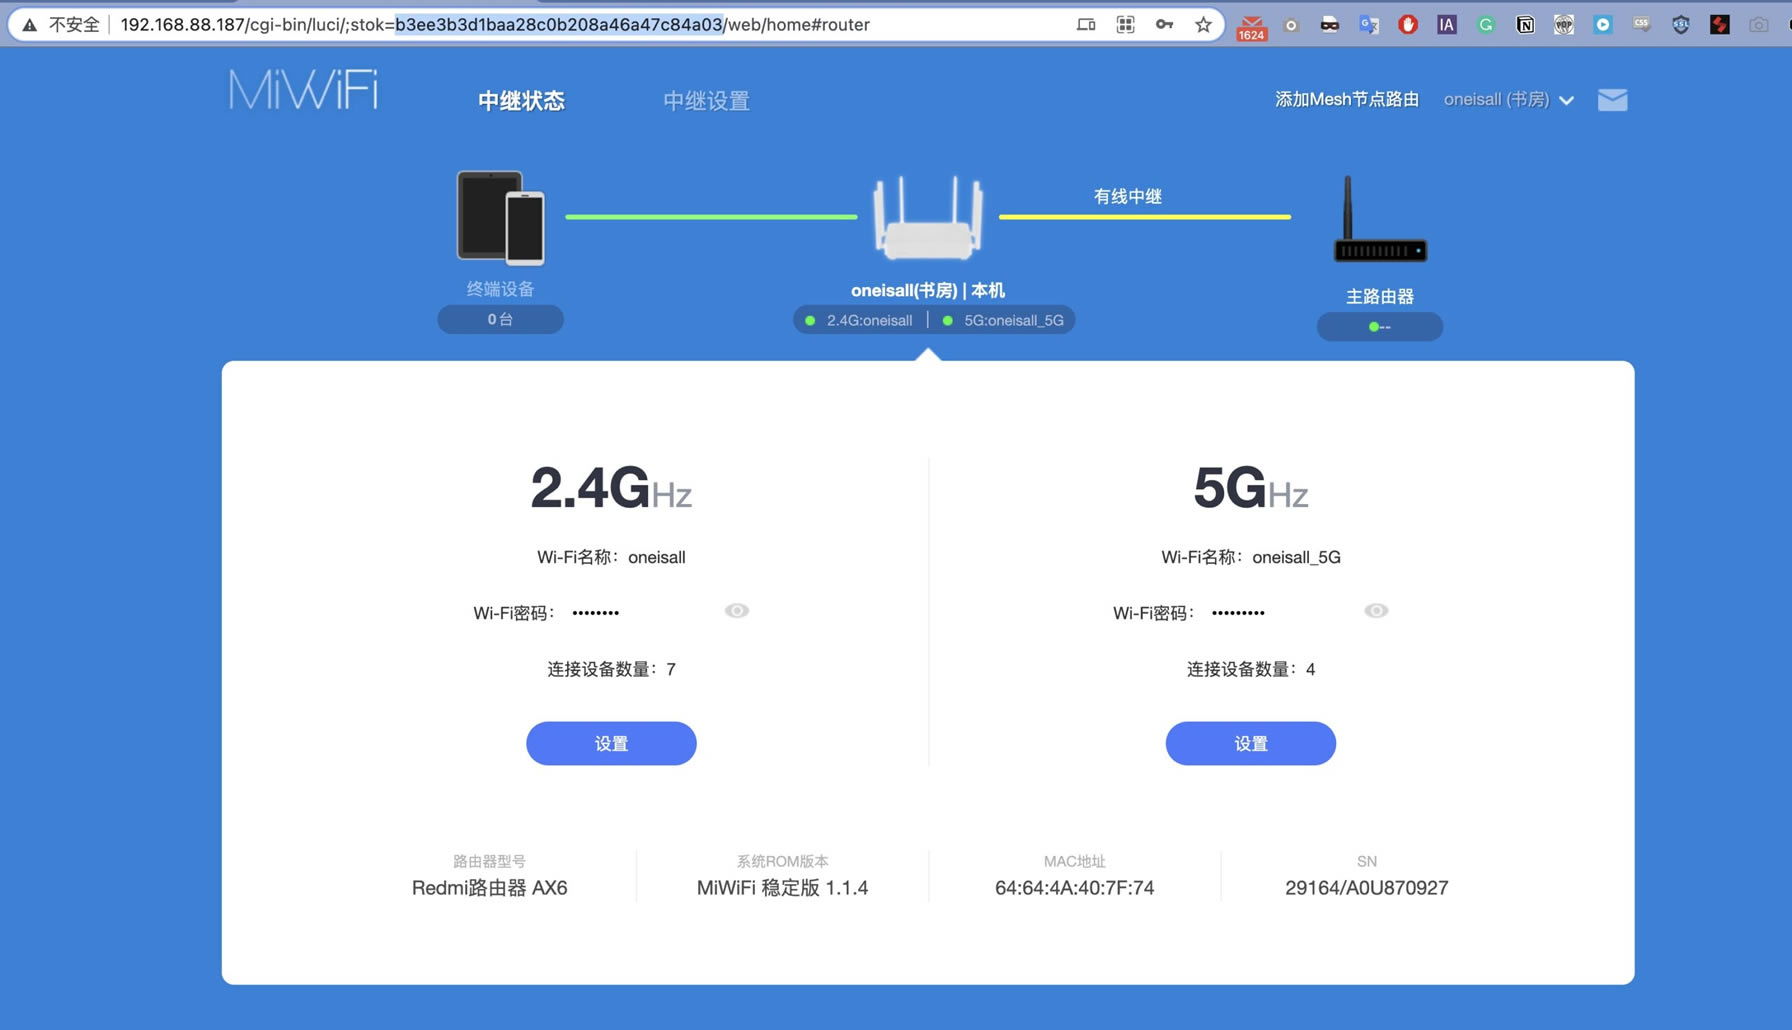
登陆小米路由器后台后,浏览器地址栏 stok= 后面的一段内容即是(选中部分),准备好备用。
第一次请求
http://192.168.31.1/cgi-bin/luci/;stok=<STOK>/api/misystem/extendwifi_connect?ssid={SSID}&password={Wi-Fi密码}
- <STOK> 替换为上面的值
- {SSID} 替换为 openwrt 路由器的 Wi-Fi 名
- {Wi-Fi密码} 替换为 openwrt 路由器的 Wi-Fi 密码
<> 和 {} 均需要替换
我的替换后如下(我的 Wi-Fi 没有密码,你的如果有密码填上密码即可)
http://192.168.31.1/cgi-bin/luci/;stok=b3ee3b3d1baa28c0b208a46a47c84a03/api/misystem/extendwifi_connect?ssid=OPENWRT_DEE_5G&password=
将替换好的值复制到浏览器请求,如果显示 code 0 则成功。

第二次请求
http://192.168.31.1/cgi-bin/luci/;stok=<STOK>/api/xqsystem/oneclick_get_remote_token?username=xxx&password=xxx&nonce=xxx
<STOK> 替换为小米路由器后台获得的值即可,其它均不用改变。
将替换好的值复制到浏览器请求,如果显示 code 0 则成功。
第四步|验证 SSH 并备份
ssh 连接小米路由器[email protected]?密码是 admin,如果能 ssh 连接上则证明上述步骤均完成。
链接成功后进行备份
mkdir /tmp/syslogbackup/
dd if=/dev/mtd9 of=/tmp/syslogbackup/mtd9
浏览器请求该地址下载备份
http://192.168.31.1/backup/log/mtd9
第五步:刷入 openwrt 固件
下载固件备用
链接: https://pan.baidu.com/s/1OobJYj7kIdxXAXn4vC9g7w
提取码: kpna
ssh 连接 红米 ax 设置env
ssh 连接上后复制下面执行
nvram set flag_last_success=0
nvram set flag_boot_rootfs=0
nvram set flag_boot_success=1
nvram set flag_try_sys1_failed=0
nvram set flag_try_sys2_failed=0
nvram set boot_wait=on
nvram set uart_en=1
nvram set telnet_en=1
nvram set ssh_en=1
nvram commit
scp 固件 qsdk 固件并刷入
scp 下载好的 xiaomimtd12.bin 到 红米 AX6 的 /tmp 下面
scp xiaomimtd12.bin [email protected]:/tmp
并在红米 AX6 上执行
mtd write /tmp/xiaomimtd12.bin rootfs
断电重启红米 AX6,此时红米 AX 6 的后台地址已经变为 192.168.1.1
重新分区
scp 下载好的 a6minbib.bin 到 红米 AX6 的 /tmp 下面
scp a6minbib.bin [email protected]:/tmp
并在 红米AX6 上执行
. /lib/upgrade/platform.sh
switch_layout boot; do_flash_failsafe_partition a6minbib "0:MIBIB"
拔电源重启路由器
openwrt刷入到rootfs_1分区
scp 下载好的 openwrt-ipq807x-generic-xiaomi_ax6-squashfs-nand-factory.bin 到 红米 AX6 的 /tmp
scp openwrt-ipq807x-generic-xiaomi_ax6-squashfs-nand-factory.bin [email protected]:/tmp
在红米 AX6 上执行刷入
ubiformat /dev/mtd13 -y -f /tmp/openwrt-ipq807x-generic-xiaomi_ax6-squashfs-nand-factory.bin
fw_setenv flag_last_success 1
fw_setenv flag_boot_rootfs 1
红米 AX6 执行命令重启
reboot
重启后完成,系统应该已经是 openwrt 系统了。
one more thing 安装 Clash
该固件并不会自带 clash ,或别的代理软件,需要手动安装。
wget https://github.com/vernesong/OpenClash/releases/download/v0.40.7-beta/luci-app-openclash_0.40.7-beta_all.ipk
opkg install luci-app-openclash_0.40.7-beta_all.ipk
因为 libcap 安装比较麻烦,所以上面 openclash 安装的是去年10月初的版本。
如果你想安装最新的可以修改
vim /etc/opkg.conf 将 /etc/opkg.conf 的内容修改为以下内容
dest root /
dest ram /tmp
lists_dir ext /var/opkg-lists
option overlay_root /overlay
#option check_signature
arch all 100
arch aarch64_cortex-a53_neon-vfpv4 200
arch aarch64_cortex-a53 300
vim /etc/opkg/distfeeds.conf 将 /etc/opkg/distfeeds.conf 的内容修改为以下内容
src/gz openwrt_19.07_base https://mirrors.cloud.tencent.com/lede/releases/19.07-SNAPSHOT/packages/aarch64_cortex-a53/base/
src/gz openwrt_19.07_freifunk https://mirrors.cloud.tencent.com/lede/releases/19.07-SNAPSHOT/packages/aarch64_cortex-a53/freifunk/
src/gz openwrt_19.07_luci https://mirrors.cloud.tencent.com/lede/releases/19.07-SNAPSHOT/packages/aarch64_cortex-a53/luci/
src/gz openwrt_19.07_packages https://mirrors.cloud.tencent.com/lede/releases/19.07-SNAPSHOT/packages/aarch64_cortex-a53/packages/
src/gz openwrt_19.07_routing https://mirrors.cloud.tencent.com/lede/releases/19.07-SNAPSHOT/packages/aarch64_cortex-a53/routing/
src/gz openwrt_19.07_telephony https://mirrors.cloud.tencent.com/lede/releases/19.07-SNAPSHOT/packages/aarch64_cortex-a53/telephony/
……